Reinstalling pfSense Plus Software
The best practice at this time is to use the Online Network Installer to install pfSense® Plus software. Most of the document covers the former method which used separate hardware-specific installation image files.
Obtain an installation image.
Ideally, use the Online Network Installer which can be downloaded from the Netgate Store using a Netgate Store Account without requesting assistance from TAC. After downloading the Online Network Installer image, move ahead to the next step and continue following the steps to boot from USB. There is a warning message later in this document at the point where readers should switch over to the Online Network Installer documentation.
To obtain the legacy Plus firmware image, please open a TAC ticket to request access by selecting Firmware Access as the General Problem and then select Netgate 1100 for the platform. Make sure to include the serial number in the ticket to expedite access.
Once the ticket is processed, the latest stable version of the firmware will be attached to the ticket, with a name such as:
pfSense-plus-compat-recovery-24.03-RELEASE-aarch64.img.gz
Note
pfSense® Plus is preinstalled on Netgate appliances, which is optimally tuned for Netgate hardware and contains features that cannot be found elsewhere, such as ZFS Boot Environments, OpenVPN DCO, and the AWS VPC Wizard.
Write the image to a USB memstick (8GB or larger).
See also
Locating the image and writing it to a USB memstick is covered in detail under Writing Flash Drives.
Tip
Remove and reinsert the memstick and the workstation will see a FAT partition on the drive. Place a configuration backup file on this drive as
config.xmlto restore later using the External Configuration Locator.Connect to the console port of the Netgate device.
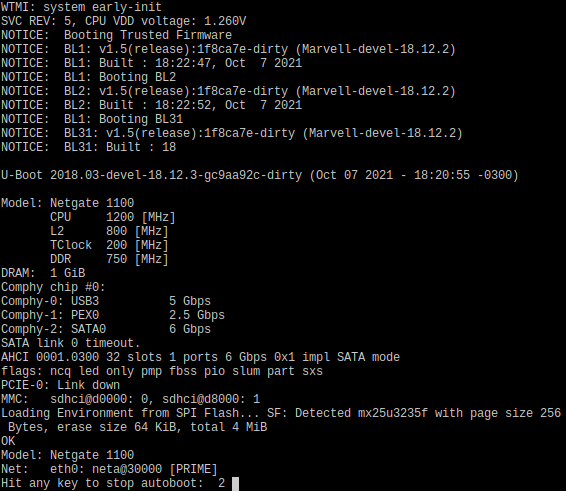
Insert the memstick into the USB port and boot the system.
Tip
The best practice is to connect to the console, turn off the device gracefully by using the Halt system option from the console and removing power once the shutdown procedure completes, then insert the USB memstick and boot the device.
Starting the recovery process requires interrupting the boot process very soon after the boot process begins, so having an active console connection before booting is important.
When prompted, press any key to stop the autoboot process.
Type
run usbrecoveryat theMarvell>>prompt and pressEnter.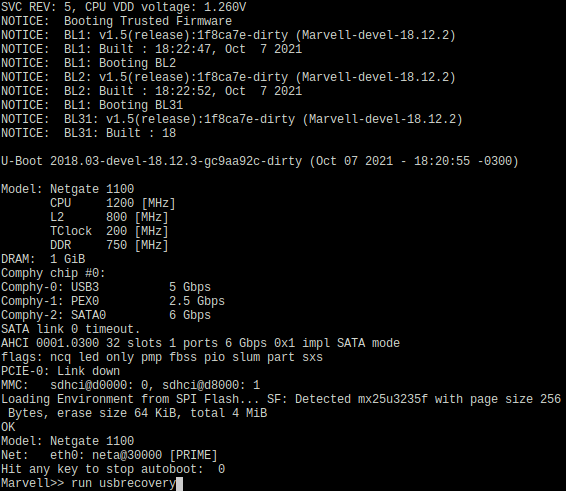
Note
If the device does not boot after issuing this command, enter
usb
reset
and then tryrun usbrecoveryagain. Some USB drives require an extra reset to fully initialize.Warning
At this point, those using the Online Network Installer should follow that documentation for the rest of the process. Only follow the remainder of this document for legacy firmware images.
Enter the destination device or press the
Enterkey to accept the default value.Note
The onboard eMMC flash memory is always
mmcsd0.Current versions of the installer automatically assume
mmcsd0for the 1100 storage device as it does not support any other storage type.Type
ythen press theEnterkey if prompted to confirm the device choice.Enter the filesystem to use for this installation, either
UFSorZFS, or pressEnterfor the default (ZFS).Note
ZFS is more reliable and has more features than UFS (e.g. ZFS Boot Environments), however ZFS can be memory hungry. Either filesystem will work, but if RAM usage is critical to other tasks that will run on this firewall, UFS can be a more conservative choice. ZFS memory usage can be tuned, however, so that shouldn’t be the only deciding factor.
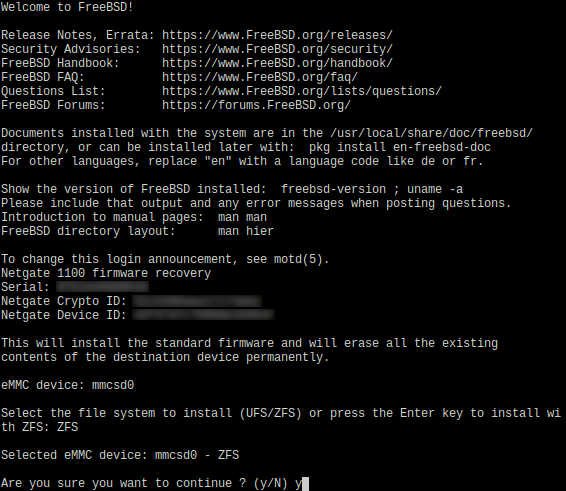
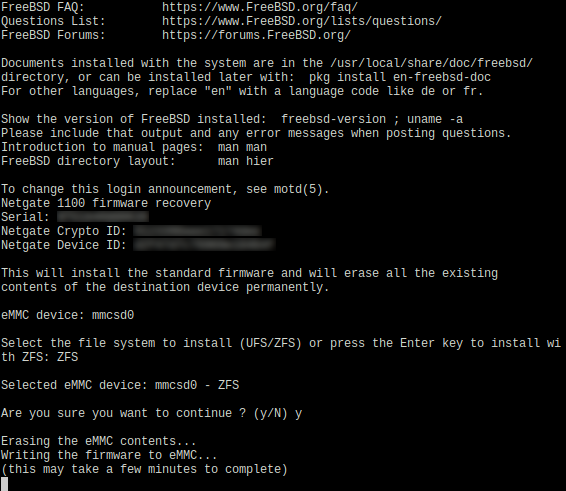
Type
ythen press theEnterkey if prompted to confirm the filesystem choice.Wait for the installation to the eMMC to complete.
Note
On some older installations, this process may also include an automated update to a more recent version of U-boot for ZFS support.
Once the install has completed, remove the memstick, and cycle the power (unplug the Netgate 1100 and plug it back in) to reboot the Netgate 1100.
Tip
If the FAT parition on the memstick contains a configuration file to restore using the ECL method, leave the memstick plugged in while cycling the power.
See also
For information on restoring from a previously saved configuration, go to Backup and Restore.